I hope you are planning on on joining as as we Fussy Cut
our way through 2014. Each Friday this year I will post
a picture of a Fussy Cut Star. This is to keep you and ME
motivated. At the end of the year we should have enough
stars to make a beautiful quilt. So lets get started.
Use the tutorial below to see how I make my stars.
I am using this fabric as my focal fabric
and to control my color palette.
We no longer have this fabric. Here is the information.
Mill Girls by Judie Rothermel for Marcus Brothers #4149
Use your acrylic template cut diamonds.
I like to use a grease pencil to mark
the details of my layout. I also like
to use this 18mm rotary cutter so I
waste as little fabric as possible.
Cut six identical diamonds.
Lay the paper template centered on the
wrong side of the fabric diamond.
Be sure to line up design.
Using a fabric glue pen add a small
dot to opposite sides of paper template.
It goes on blue but dries clear.
Fold two opposite sides of the fabric
diamond onto the paper template.
Press the seam allowances into
the glue to make them stick.
Repeat on the other two sides.
Repeat to make 6 identical diamonds.
Sew Diamond together in sets of two.
Hold two diamonds right sides together,
lining up edges and design. Thread needle
with a color that will blend. I like to use
YLI cotton quilting thread and sharp needles.
Join six diamonds to create three sets.
Join two sets together.
Add the third set.
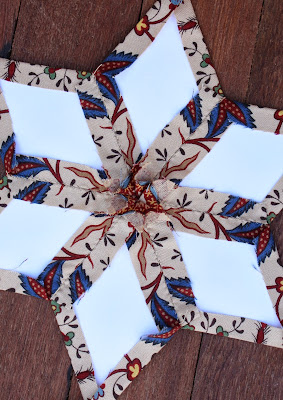
This is what the back of your star will look like.
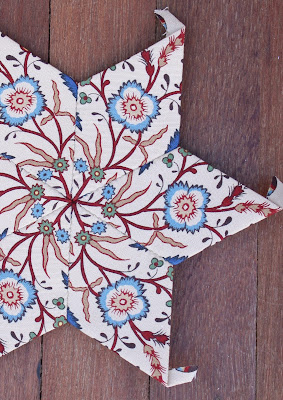
Finished Star. Wasn't that fun.


.JPG)


Gorgeous!
ReplyDeletebeautiful fabric and beautiful star ;)))
ReplyDeletehappy new year ;)
ciao Maria
What size are your diamonds? Are we on our own to make what ever size we like?
ReplyDeleteYes, what size are your diamonds.
ReplyDeleteLove it! Now to select fabric. Thank you for the gift fabric in my starter pack.
ReplyDeleteI made my very first one tonight, before I read your tutorial, and without the glue. I was all thumbs! It took a long time, but it came out nice. I'm curious how we're going to tuck those tails under when we applique them down.
ReplyDeleteI purchased the paper pieces and the template from you. Thank you for the beautiful fabric! Where do I get a grease pencil from?
ReplyDeleteMarilyn
Great tutorial - when you say to press the fabric down do you mean finger press or press with an iron?
ReplyDeleteThis comment has been removed by the author.
ReplyDeleteI just couldn't resist any longer! Can't wait for my template and pieces to arrive!
ReplyDeleteI just couldn't resist any longer! Can't wait for my template and pieces to arrive!
ReplyDeleteGreat tutorial. Only dif is I like to sew tehm together in groups of three and then sew them together along that long line. Thanks for Sharing! Beautifully fussy cut. I invite you to link to Hexie Friday so others can see your 2014 QAL.
ReplyDeleteI didn't receive any practice fabric when I ordered the templates. I think it would help get me started. Can you show the original fabric used for each Friday block please?
ReplyDeleteI have 17 finished! Is anyone else on track with these fun stars?
ReplyDelete131 stars and still going. I am addicted and loving every minute.
ReplyDeleteThis is lovely, thanks for the tip to use glue for Fons and Porter, yahoo!
ReplyDeleteI've made 100 of these stars so far - shared on my blog today! They are definitely addicting!
ReplyDeleteI haven't tried EEP yet, I want to but I have to ask, do you take the papers out or are they glued in place?
ReplyDeleteIs there somewhere we can see the responses to the questions asked in the comments?
ReplyDeleteWhat size are the diamonds? Do you use a 1 inch hexie then to connect all the stars???
ReplyDelete